Home | Photos | "How To" | Links | Contact
Midnight Lightning
"How-To" Page
Custom Built Brake Pedal
Disclaimer: I can not be held responsible for anyone screwing up their bike or accessories when attempting this modification.
While it worked well for me, I can't guarantee other people's workmanship or prevent their mistakes.
You undertake this at your own risk!
After buying my bike in Feb. 2003, I started to search all over the internet for others who had Roadstars.
I wanted to get some good ideas on what style I wanted for my ride as I mildly customized it.
I found a guy named Nick in the UK with a Wild Star (what Yamaha calls the Roadstar in Europe).
He called his ride Thunder Bike:
http://www.midnight-ride.com.
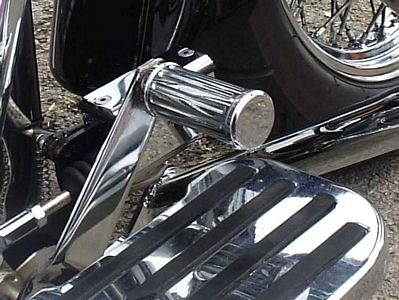
I loved several things about his bike, but his brake pedal really caught my eye. Here's a pic of his:
You can see that his pedal is longer than the one I built. He had someone "machine" it for him.
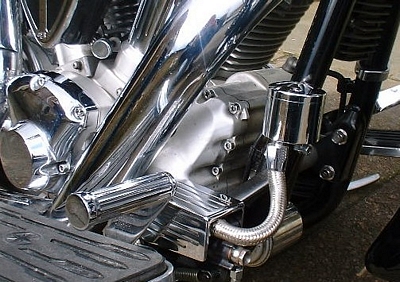
I've seen a foot-peg that looks like this and thought about using it, but didn't want the expense of buying it, I didn't have a welder to attach it to the brake lever, and I didn't want to send it out for re-chrome expense, since this was just an experiment.
So... I decided I could achieve a very similar look with a covered peg from a heel-toe-shifter lever.
Since building this about 3 years ago, it's never failed me. I also built the same set-up for two of my friends. Their's are holding up fine too.
Parts Required - Here are the parts required for my particular build/set-up:
|
An extra heel-toe-shifter
In order to make this, you need an extra heel-toe-shifter because you'll be cutting off one of the ends to get what will become your brake pedal.
I found mine on ebay. You could also buy one from a Yamaha dealer at the factory OEM cost (probably too much!)
|
An extra brake lever (or use the one on your bike)
You'll need an extra brake lever, or use the one that is currently on the bike.
Note, however, that you will be cutting off a welded bracket that holds your current pedal on the brake lever. In other words, once you modify your brake lever, you can not revert back to your normal pedal. It's better to have an extra just in case you change your mind about the mod later.
Once again, I found mine on ebay. You could also buy one from a Yamaha dealer at the factory OEM cost.
|
Chrome Shift Peg Cover
I assume the reason you might want to do this is because you have the chrome shift peg covers on your heel-toe-shifter. Otherwise, I am not sure why you would want to go through with this.
Therefore, you'll need another cover for the brake pedal your making too.
|
Flat-head Screw
You'll want to use a flat head screw that has a diameter that won't break through the walls of the peg you'll cut off (you'll be drilling and tapping it).
You'll also want it to be short enough that it won't come out of the end of the peg.
I don't recall what I ultimately used, but it seems like it was somewhere around 1/4-20 or 3/8-16.
|
How to build it:
|
Step 1:
If you're using your stock brake pedal lever, remove the floorboard assembly and remove the brake lever and pedal assembly from the rest.
Remove the brake pedal from the brake pedal lever.
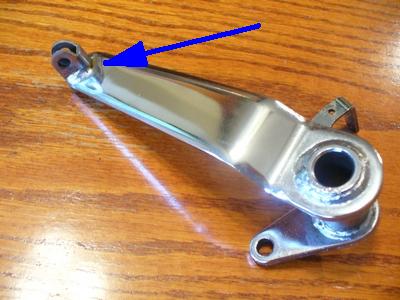
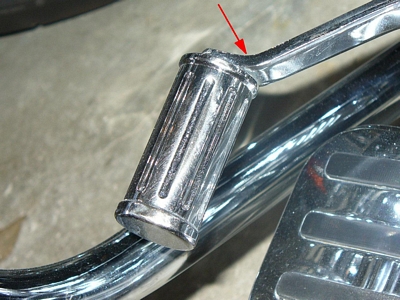
You'll be cutting off this bracket marked in the photo (where the pedal, pin and spring were attached).
|
Step 2:
Carefully cut off the bracket at the far end of the brake pedal lever (where your pedal mounted).
Do your very best not to scratch the rest of the chrome lever.
Gently, and carefully file down any part of the bracket that still protrudes from the flat surface. Keep the file marks out at the end where the new pedal will be attached.
|
Step 3:
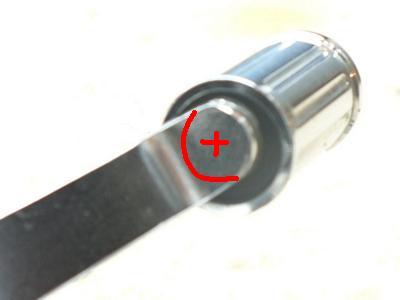
Take your extra heel-toe-shifter and cut off one end, as close to the peg as possible.
Cut it somewhere close to where I have it marked in the photo.
|
Step 4:
Gently and carefully grind/file the cut edge of the heel-toe-lever so it ends up shaped round at the base of the peg.
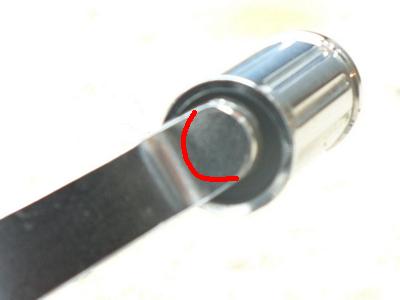
This crudely drawn line should give you some idea about what you're going for after grinding and filing the base down after cutting.
|
Step 5:
With the peg cover removed, attempt to move the rubber on the peg back far enough to measure the outer diameter (OD) of the peg.
Determine the (OD) of the largest screw you can drill and tap into this peg.
Obtain a screw of the size and length that will work for the OD and length of peg, drill and tap the hole for the screw.
The longer and larger diameter of the screw, the stronger it will be to withstand the pressure of your foot on the pedal.
|
Step 6:
Now....switch back to the brake lever you've worked on.
Hold the peg up against the brake pedal lever and determine where the screw will have to pass through the lever.
Center punch and drill a clearance hole large enough for the screw you chose to pass through.
Next, countersink the hole on the back side of the pedal.
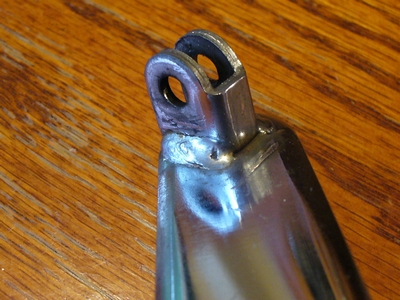
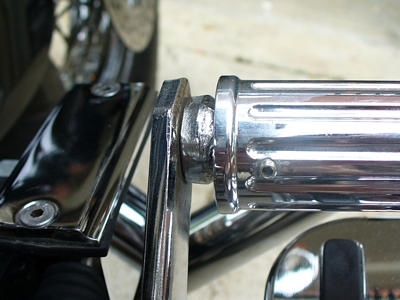
Once the hole is drilled and countersunk, and the peg is atached, it will look like this:
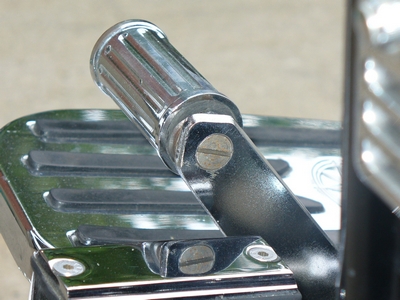
No-one sees this screw.
|
Step 7:
Attach the peg onto the brake lever using blue loc-tite, and tighten the screw down very firmly. Put the chrome cover on the peg.
Re-assemble the new brake lever to the floorboard/brake assmebly and attach it all to the bike.
|