Midnight Lightning
"How-To" Page
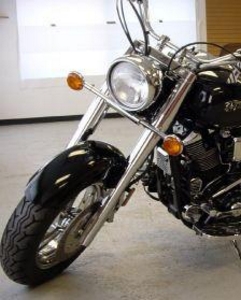 Before |
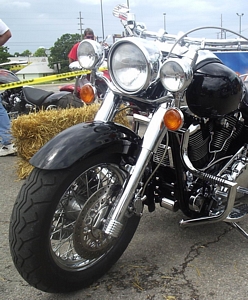 After |
Lowering Your Front 1.5" for Almost Nothing
Disclaimer: I can not be held responsible for anyone screwing up their bike or accessories when attempting this modification.
While it worked well for me, I can't guarantee other people's workmanship or prevent their mistakes.
You undertake this at your own risk!
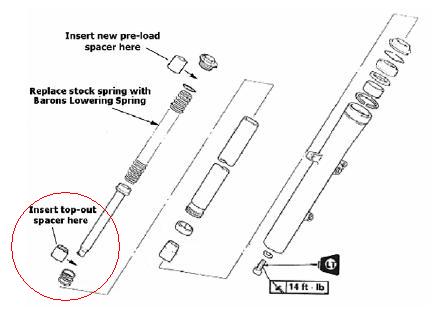
TJ on the Road Star Riders forum [see Links] had just purchased a kit.
His measurements were:
Length: 38mm or 1-1/2"
Here's a drawing he made:
[also reference RSR message: 59382.28 for this drawing]
To go along with my rear lowering, I wanted to lower the front too for that long, low look.
Barons has a kit that was about $110 at the time. It's $140 now.
Being tight on funds, I wanted to find a cheaper way out.
Someone else mentioned that they heard of making your own spacers and lowering it, and asked TJ to measure his kit spacers.
[Reference RSR message thread: 59382.1]
OD: 32mm or 1-1/4"
ID: 22.50mm or 7/8"
wall thickness: 4.75mm or 3/16"
![]()