Midnight Lightning
"How-To" Page
Thunder Monster Baffles
Disclaimer: I can not be held responsible for anyone screwing up their bike or accessories in attempting this modification.
While it worked well for me, I can't guarantee other people's workmanship or prevent their mistakes.
You undertake this at your own risk!
My Bub Big Willies sounded okay, but seemed to be missing something. They had the stock baffles, which made a decent sound, but the fluttering/whiffling sound on deceleration sounded very 'wimpy' to me. I wanted something with more guts and growl to it.
Several years ago on the Road Star Riders forum [see Links], the folks from Big City Thunder started talking about their custom baffles. They sounded great, and the forum members who bought them just raved. So I bought a set.
WOW! What a fantastic sound!! My wife even loves the kick-ass bark and growl out of these things.
Want incredible sounding pipes?
Want all the riders behind you (regardless of bike brand) asking you what kind of pipes you have and compliment you on the sound?
I get this all the time!
Here's where you can buy yours....
Big City Thunder:
http://www.bigcitythunder.com/
Here are some pics I took before installing them:
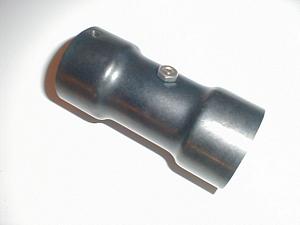
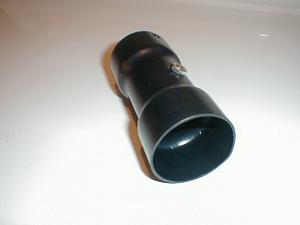
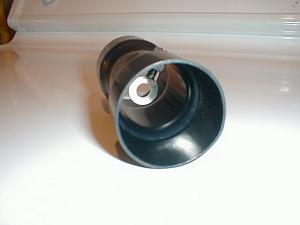
Instructions come with the baffles, but essentially: remove pipes from bike, remove old baffle (usually a pain in the ass! - see how I did it below), install Thunder Monster baffle using the mounting screw that was holding the stock baffle, re-install pipes, ENJOY!
Abbreviations used:
ID = Inner Diameter
OD = Outer Diameter
I no longer have the old baffles laying around to measure, but I would estimate them to be about 12 to 15 inches long. Even though the baffles have louvers along its body, there is still a LOT of surface area in contact between the pipe ID and baffle OD. That's why the carbon build up from years of use is so difficult to break loose.
WARNING:
There's a strong probability that you may damage your pipe(s) while trying this, so don't attempt it unless you're desperate and willing to take the risk (I was). I will not be held responsible for your unsuccessful attempt at this method!
So here's what I ended up doing:
- Of course, make sure the exhaust tip (if you have one) is removed, and also make sure that the screw on the bottom of the pipe that holds the baffle to the pipe is also removed.
- I inserted a screwdriver blade between the pipe ID and baffle OD, and gently twisted the blade to cause the baffle to dent inwards, away from the pipe wall, being as careful as possible not to dent the pipe outwards - although, it is likely to occur. I did this on what is essentially the underside of the pipe once installed (on the side of the pipe diameter that is on the bottom of the pipe, and unviewable). I did this again right next to the dent I just made in an attemot to expand/widen the baffle dent-edge large enough to grip with a large vice grip.
- Then I clamped onto that dented baffle edge VERY tightly with the vice grip.
- Then I sprayed a TON of WD-40 lubricant down inside the baffle EVERYWHERE, and let it sit to soak in and lubricate for maybe 20 minutes - tilting the pipe side-to-side to get the libricant as widely distributed around the baffle as possible.
- Then, I set a stack of old towels on the garage floor, and while standing, held the pipe up vertically off the ground by the vice grip, with the vice grip FIRMLY clamped onto the bent-in lip of the baffle. Do NOT clamp the vice grip on the pipe! It clamps onto the lip of the baffle you just pried/bent inwards. The towels are there for protective padding for when I set the pipe down, or in case the pipe drops while holding it up.
- Then, in a similar manner to the way a slide hammer works, I held the pipe off the floor with the vice grip and hit the vice grip UPWARDS using a large brass-head hammer. (There wasn't much of a spot on the vice grips to hit the hammer solid, so be careful).
- By doing this over, and over again, the baffle is being forced upward, and the weight of the pipe and gravity pulls the pipe downward. It took a LONG time, LOTS of hitting, taking breaks, and tired arms before it finally came out.
- Repeat for second pipe (whew!)
You can see that this method is not very clean, guaranteed or scientific, but it worked for me. Your results may vary. I don't know any other way of getting it out, outside of some kind of slide hammer the hooks on to the louvers inside the baffle somehow - a tool I presume you would have to fabricate yourself.
Home | Photos | "How To" | Links | Contact